Visualisation exercise.
posted by Niel Malan @ 23:14
0 comments
![]()
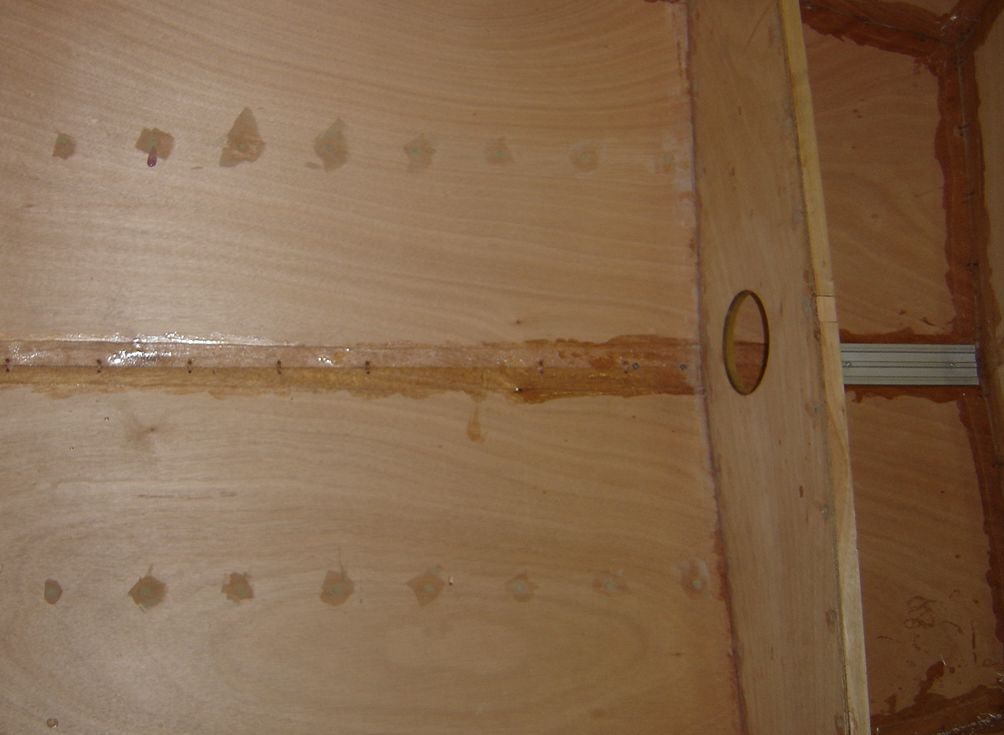
 Attaching the runners: with the straight portions fixed, the curved parts can be pulled down.
posted by Niel Malan @ 20:25
0 comments
![]()
 Attaching the runners: the straight portions stuck on first.
posted by Niel Malan @ 20:22
0 comments
![]()
 Capsize! Clamping the dinghy in this position allows work to be done from both sides.
posted by Niel Malan @ 19:40
0 comments
![]()
 The seat tops with the screw head holes filled with a first layer of body putty.
posted by Niel Malan @ 14:43
0 comments
![]()
Step 20. Sand the entire boat, inside and out .... This dreaded step is now a day or two away, and I've started preparations for it. I'm filling all the screw head holes with body putty, and ironing out dents. Yes, ironing. A damp cloth and a hot iron will remove dents in the plywood, or at least reduce the severity significantly.
posted by Niel Malan @ 13:48
0 comments
![]()
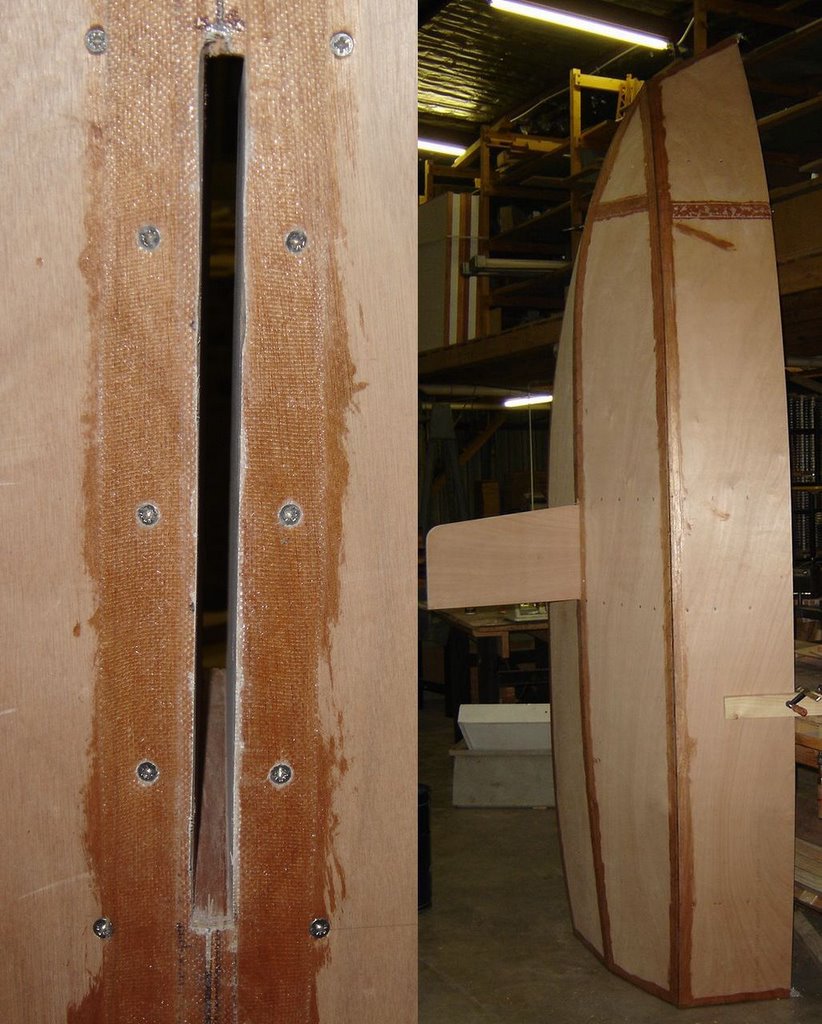 Left: The daggerboard slot cut in the bottom of the boat. It could have been worse.
Right: The daggerboard in position.
Left: The daggerboard slot cut in the bottom of the boat. It could have been worse.
Right: The daggerboard in position.
posted by Niel Malan @ 23:56
0 comments
![]()
 The daggerboard being laminated in a dual pneumatic press setup. The daggerboard is not visible in the picture. It is covered with newspaper to prevent it from being stuck to the platens.
For this I used Genkem's Cascamite adhesive, to compare it with the NUI urethane adhesive.
The daggerboard being laminated in a dual pneumatic press setup. The daggerboard is not visible in the picture. It is covered with newspaper to prevent it from being stuck to the platens.
For this I used Genkem's Cascamite adhesive, to compare it with the NUI urethane adhesive.
posted by Niel Malan @ 13:45
0 comments
![]()
 A daggerboard casing guide in action. These guides will be removed when the daggerboard slot is cut.
posted by Niel Malan @ 13:43
0 comments
![]()
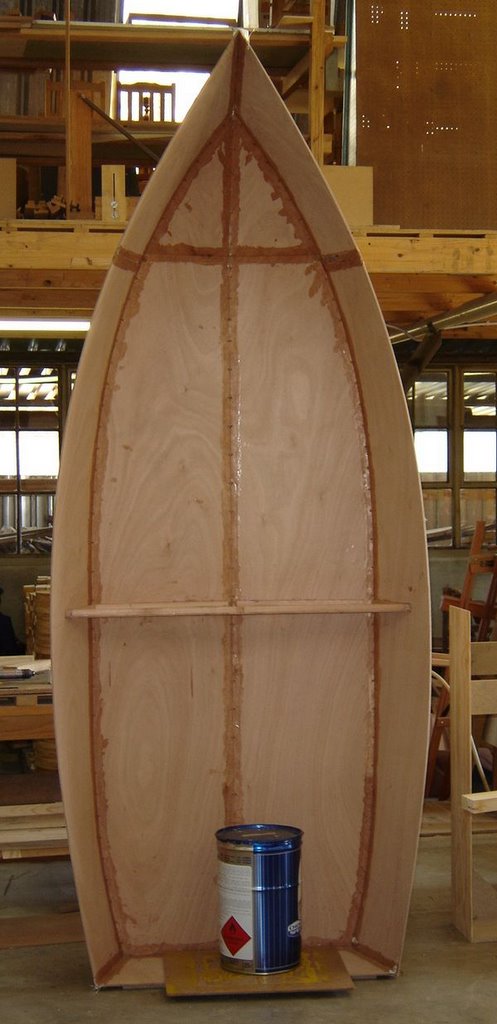
 Testing the daggerboard box for fit. Not too bad, considering ...
posted by Niel Malan @ 20:31
0 comments
![]()
 The bow seat top fitted. The deliberate mistake fixed with a few deft strokes of a radial arm saw.
posted by Niel Malan @ 20:25
0 comments
![]()
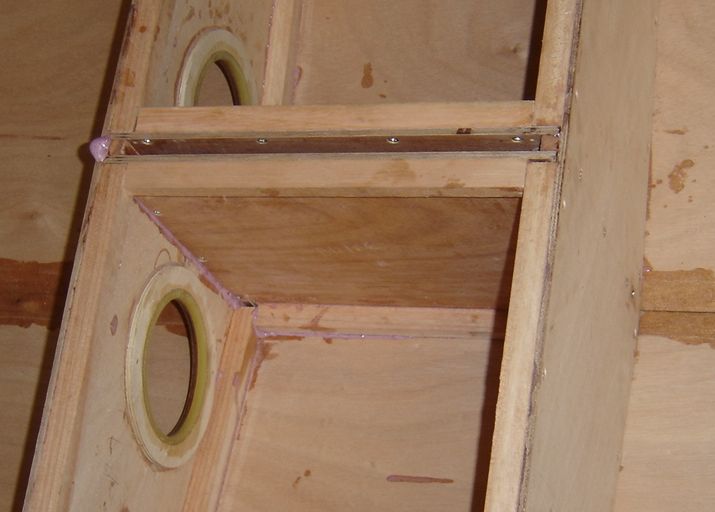
 The mast collars in press. The picture on the left shows the layout, on the right some detail of the collars themselves.
posted by Niel Malan @ 15:15
0 comments
![]()
 Glueing up the mast collars. Notice the purple adhesive. Pages from old telephone directories are useful wherever there are sticky stuff.
posted by Niel Malan @ 15:12
0 comments
![]()
posted by Niel Malan @ 15:10
0 comments
![]()
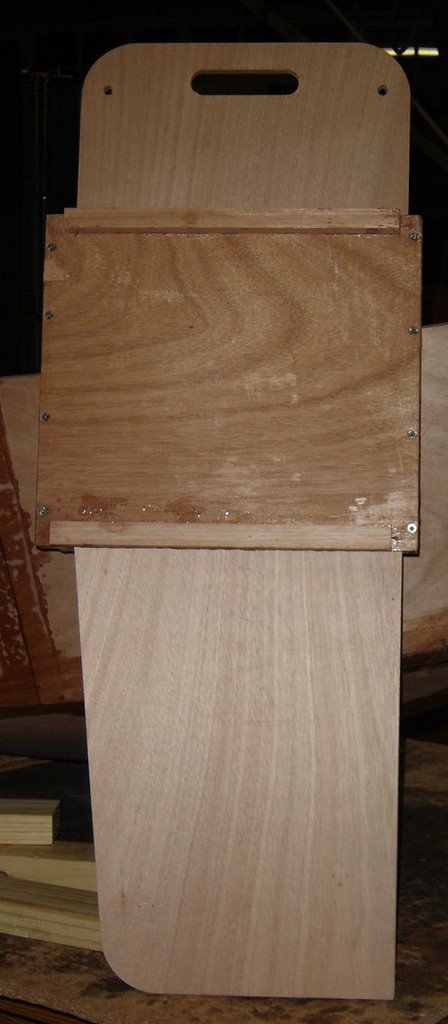
 The bow seat top with cleats. Can you spot the deliberate mistake?
posted by Niel Malan @ 15:08
0 comments
![]()
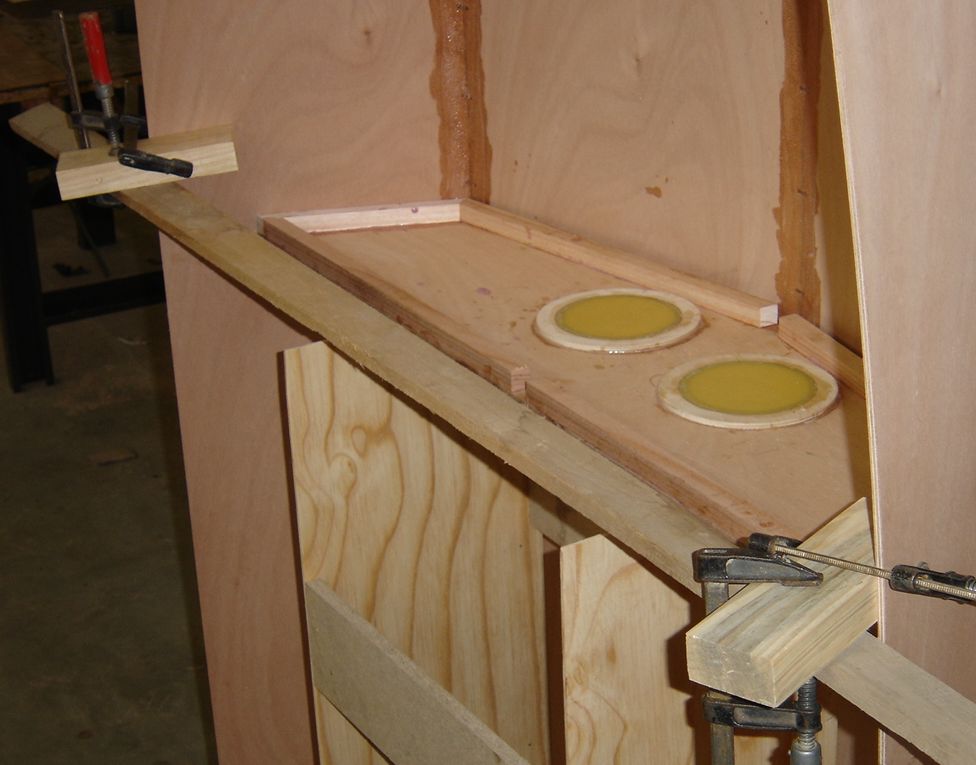
 The midships seat top being fitted with cleats and stiffeners.
posted by Niel Malan @ 21:06
0 comments
![]()
 The daggerboard casing, still messey with the glue's foam-out.
posted by Niel Malan @ 21:01
0 comments
![]()
 The daggerboard casing had me worried. The plywood it was cut from was twisted, and I feared that the daggerboard may not slide smoothly. I decided to make use of a pneumatic press to flatten it. Here the daggerboard casing lies on the bed of the press.
posted by Niel Malan @ 20:50
0 comments
![]()
 Finished fiberglassing the outside seams. Just in time, with just enough resin. She'll float now!
Merry Christmas, little boat!
Finished fiberglassing the outside seams. Just in time, with just enough resin. She'll float now!
Merry Christmas, little boat!
posted by Niel Malan @ 19:29
0 comments
![]()
 In at fitting conclusion to the week, the final bulkhead on the Argie 10 is installed. One is tempted to feel it will be downhill from here, but there's still a lot to be done, not the least of which is the finishing.
posted by Niel Malan @ 19:25
0 comments
![]()
 The bow seat bulkhead fitted. It lies about 4 mm too far aft in relation to the midships seat bulkhead.
posted by Niel Malan @ 13:57
0 comments
![]()
 Fitting the bow seat bulkhead. It was a very tight squeeze to get it into the acute angle of the bow.
posted by Niel Malan @ 13:23
0 comments
![]()
 Two bulkheads fixed in place. The clamps will stay in place until the glue has set. By happy coincidence the stern seat top is just as wide as the bulkheads are apart.
posted by Niel Malan @ 19:15
0 comments
![]()
 The first bulkhead fixed in place. It is about two millimeters too far towards the stern.
posted by Niel Malan @ 19:13
0 comments
![]()
 Polyurethane sticks to skin and is very difficult to remove.
posted by Niel Malan @ 14:16
2 comments
![]()
 Giving the cleats the correct angle to match the hull: transferring angles from the hull to the sanding disk.
posted by Niel Malan @ 14:10
0 comments
![]()
 The solution: a spacer made of plywood and chipboard to give the correct distance from the transom.
posted by Niel Malan @ 14:04
0 comments
![]()
 The challenge: installing parallel bulkheads in a structure where there are no straight lines and no right angles.
posted by Niel Malan @ 14:00
0 comments
![]()
 The workbench where the attachment of cleats to a bulkhead is in progress.
posted by Niel Malan @ 19:30
0 comments
![]()
 The first bulkhead (midships seat forward) to have its cleats glued and screwed on.
posted by Niel Malan @ 14:18
0 comments
![]()
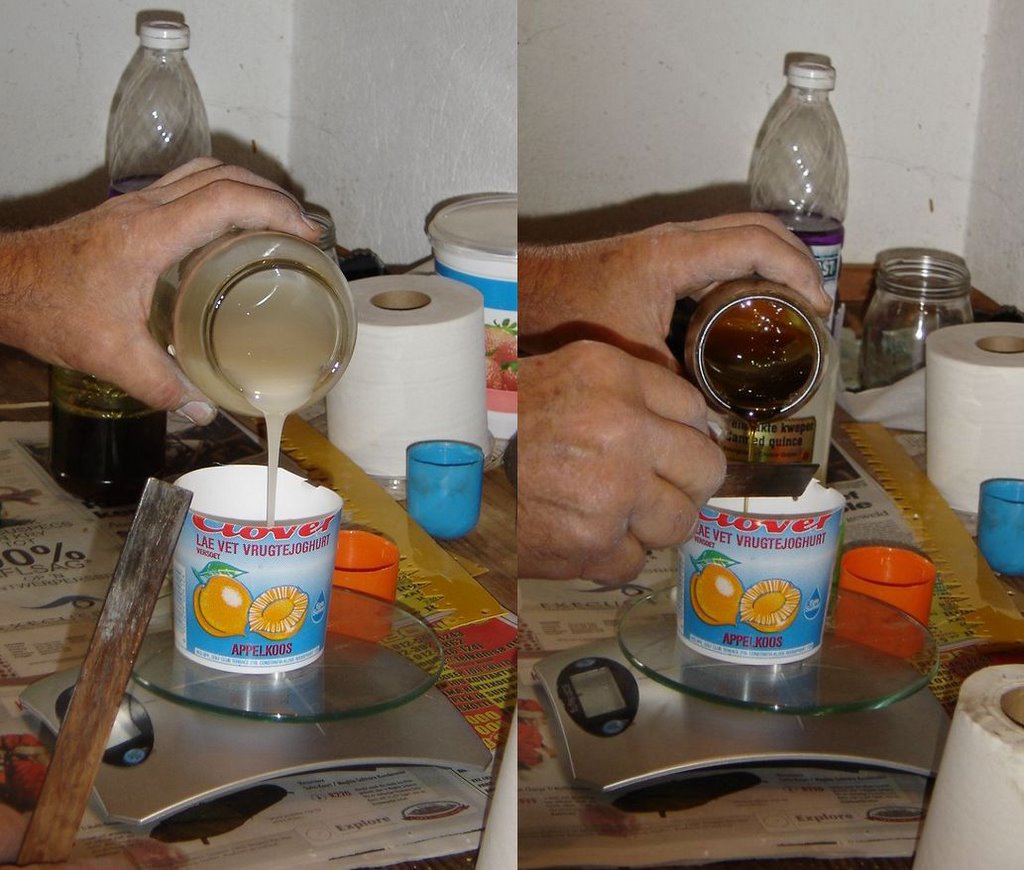 Make a polyurethane elastomer: measuring off the isocyanate and polyol.
posted by Niel Malan @ 10:27
0 comments
![]()
I am building the Argie 10 sailing dinghy. Its a simple design suitable for beginners.